A few details about our kiln opening event.
Read More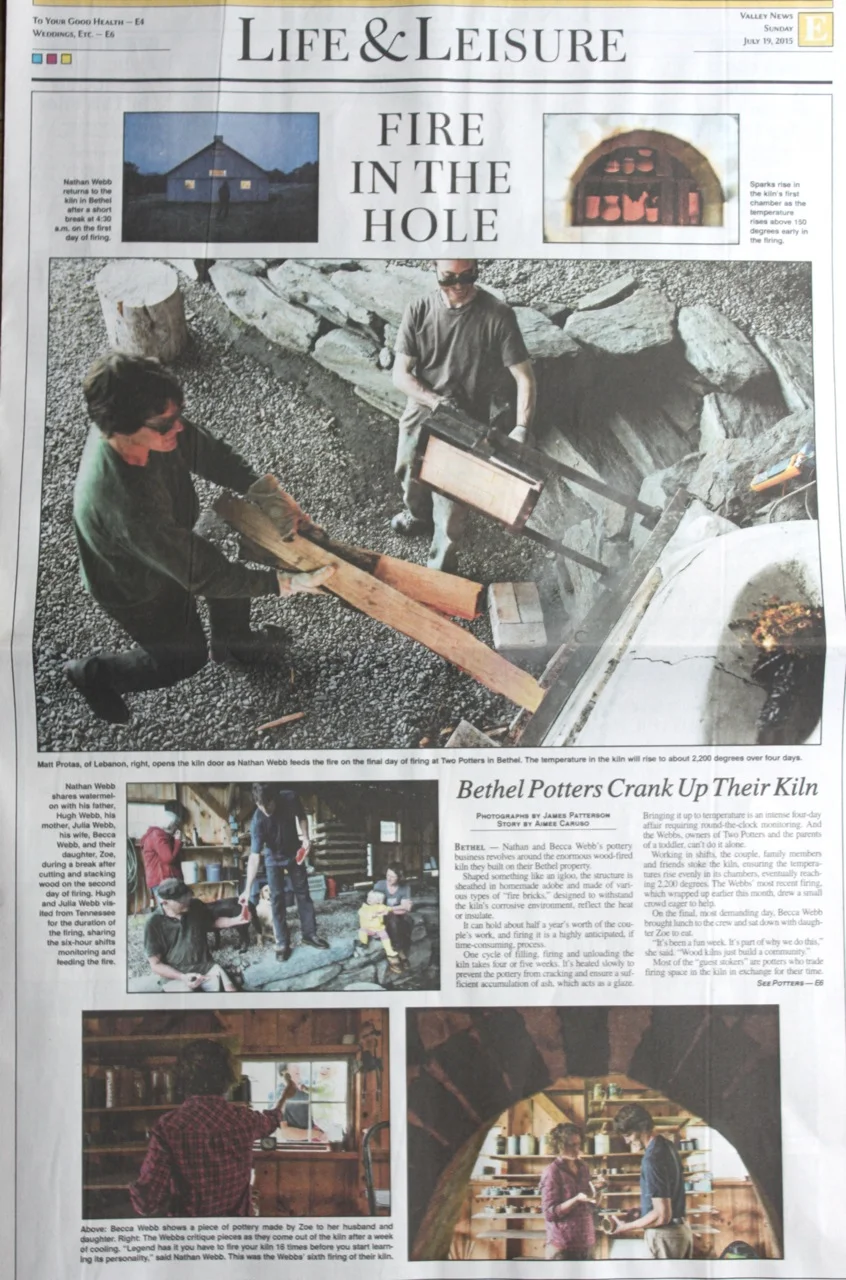
oh, hey, look at that
 We were so pleased to return home from a great show to find this piece in the local paper. Thanks to James and Aimee and the folks at the Valley News for the time spent around the kiln this summer!
Read the article here.
Quick note: We hope to have some more updates on our last firing and new work here soon! New pots will be posted to the online shop in mid-August . . . in the meantime, as always, feel free to contact us if you're looking for something you don't see online. Thanks!

these things we make

IMG_9616
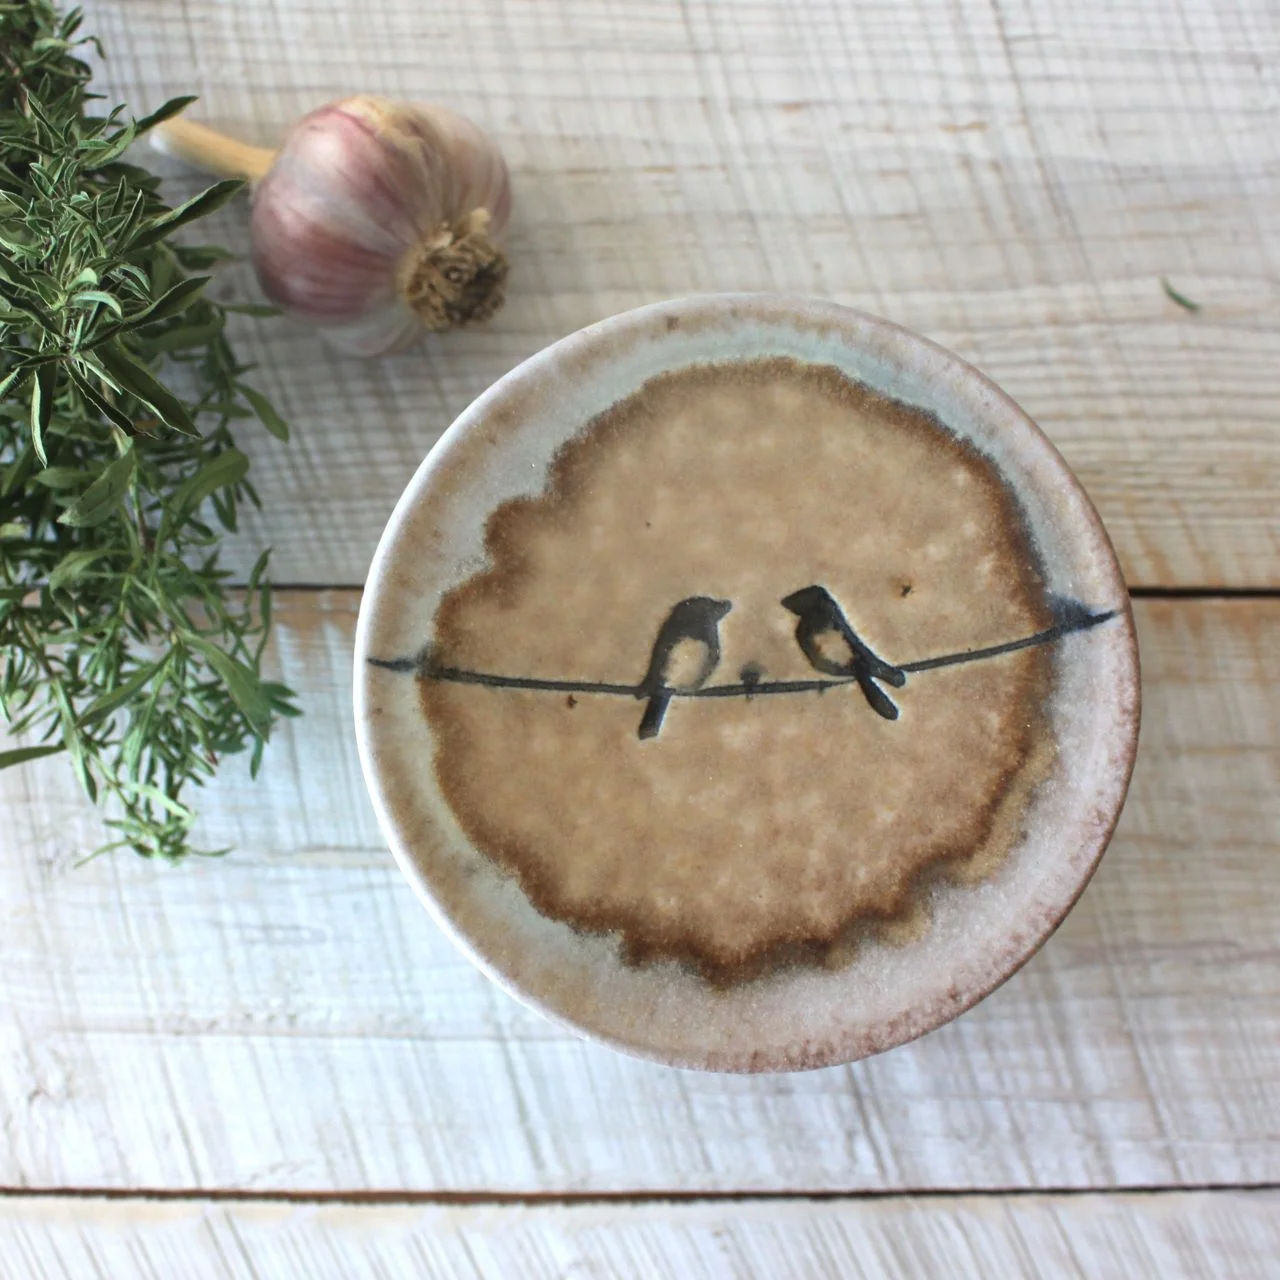
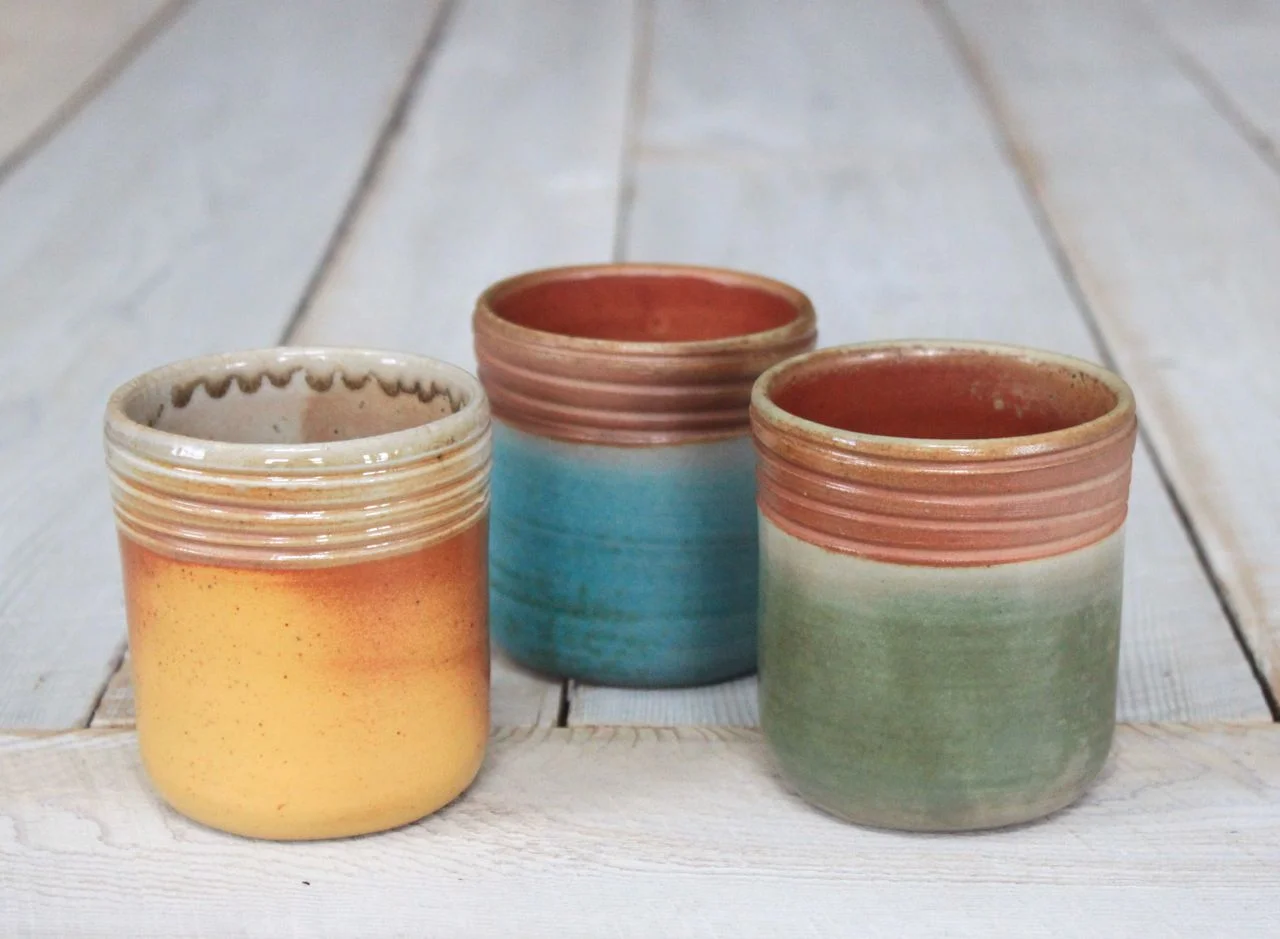
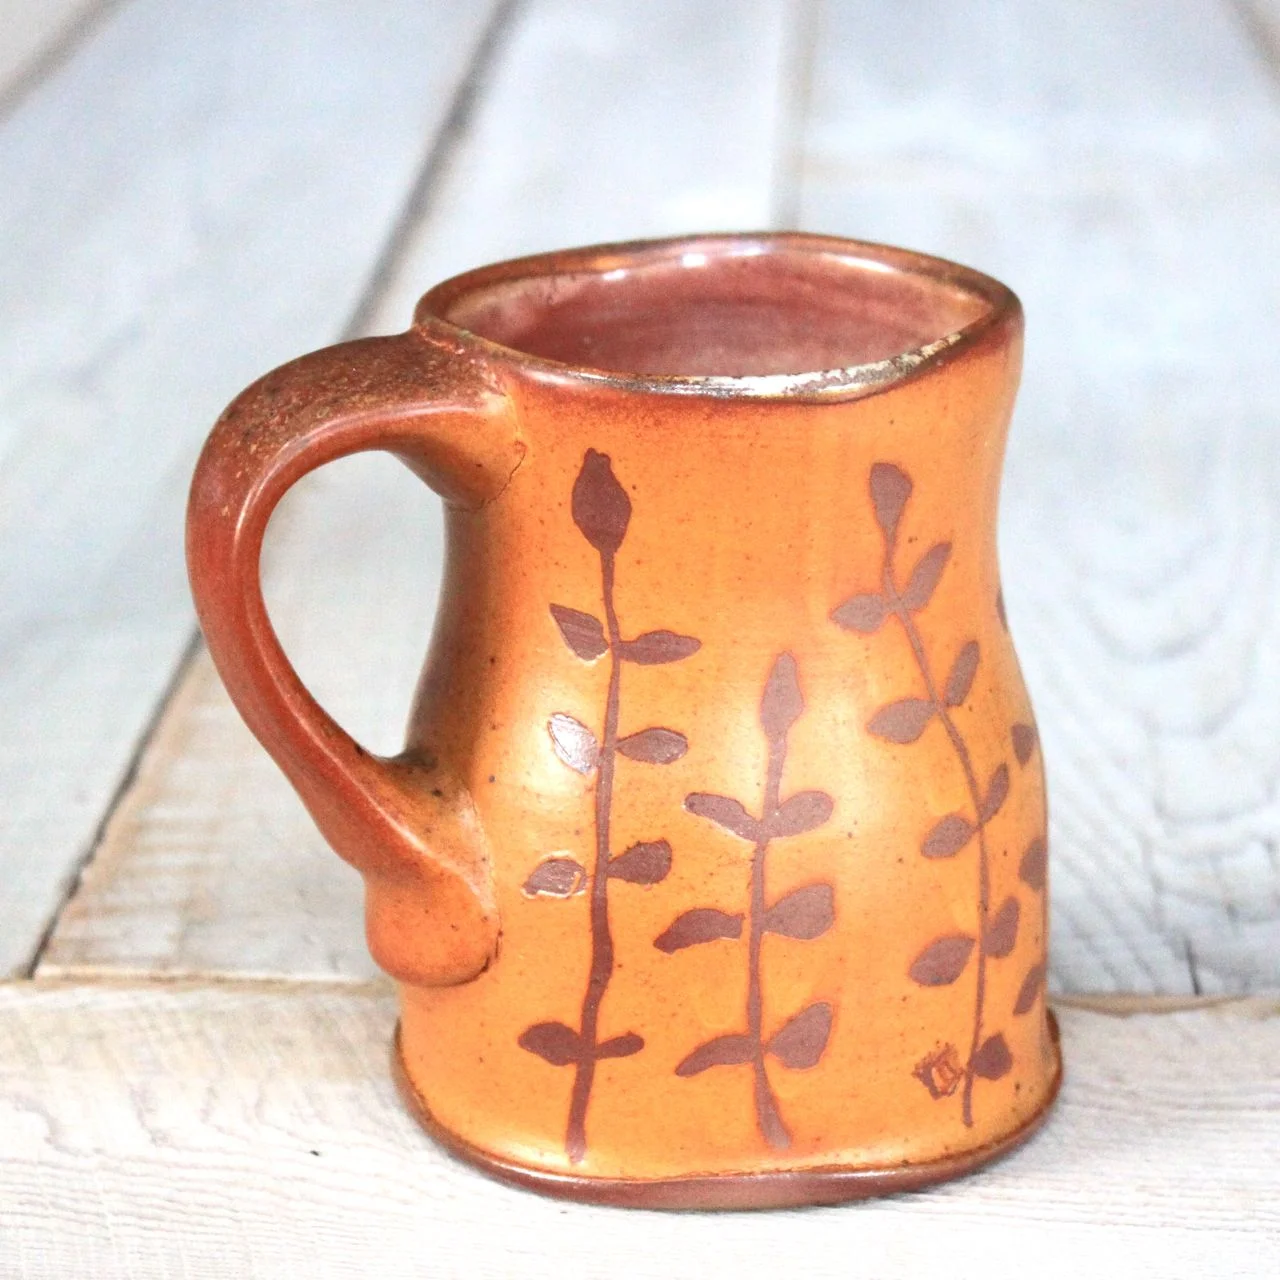
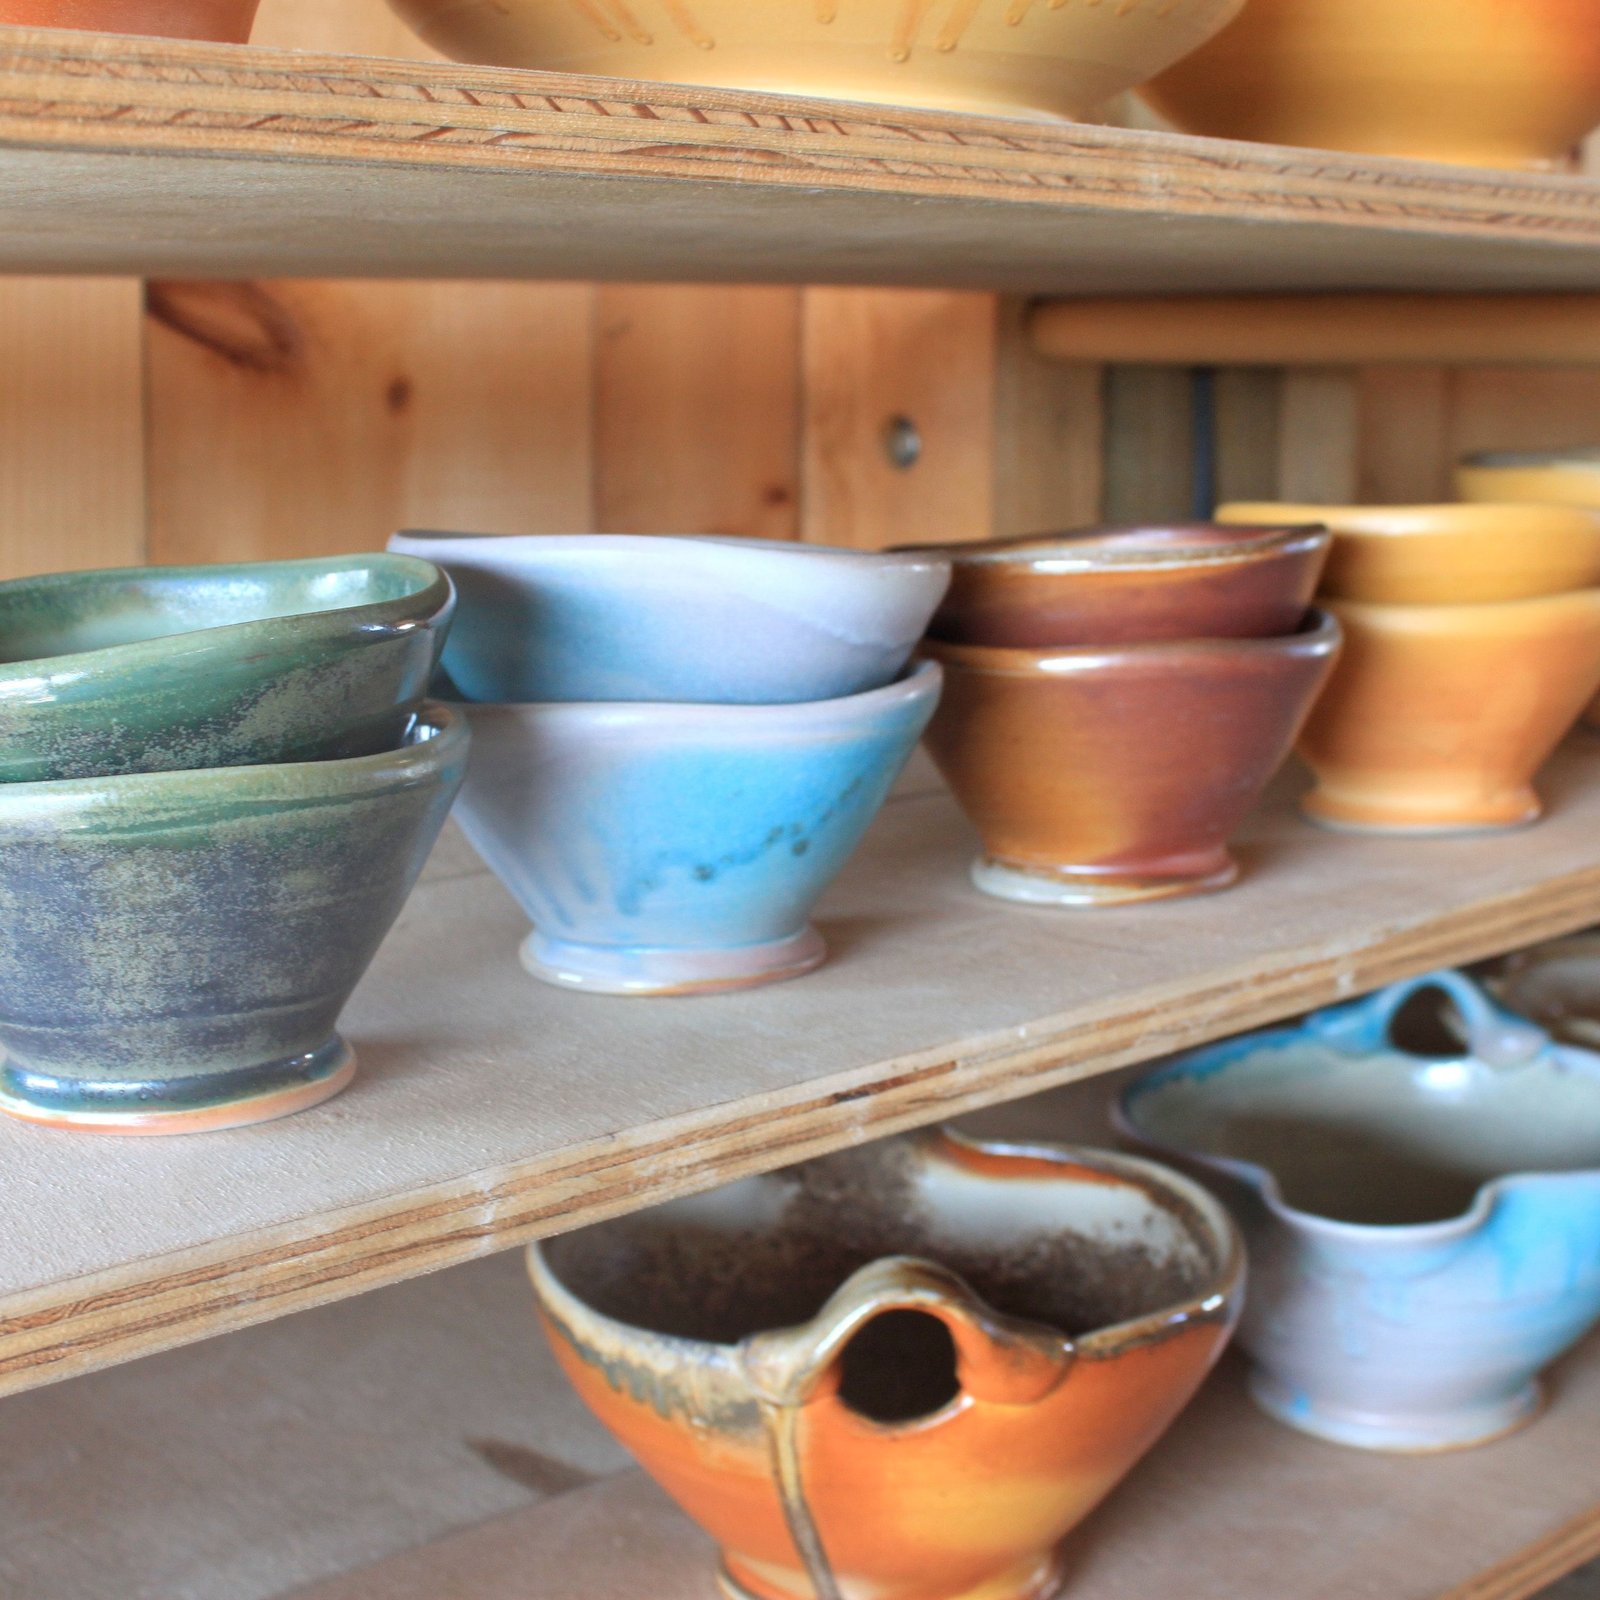
We were so happy with our last wood-firing. I'm not sure we've yet shared the results, in photo form, in this space. Here are some of our favorites . . .
IMG_9762
IMG_9791
IMG_9650

IMG_9695

IMG_9675

IMG_9802

IMG_9553_2
IMG_9593

IMG_9541

IMG_9620

IMG_9614

IMG_9573

IMG_9579

IMG_9588

IMG_9442

IMG_9801

IMG_9797

IMG_9812

IMG_9745
~Becca

our first fall firing
It was honestly a bit of a scramble to decide in late August that we should try to turn over a firing in a mere eight weeks. I am happy (and, yes, a bit tired) to report that we totally. did. it.
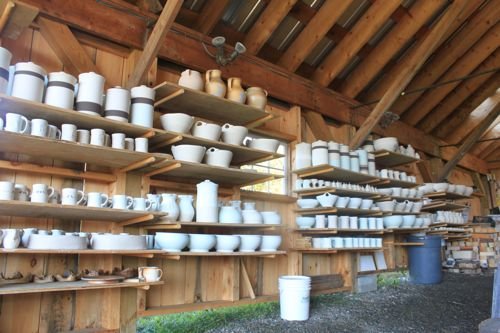
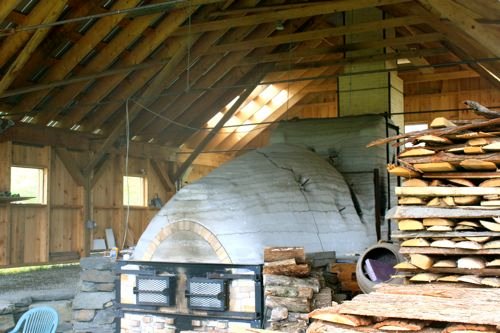
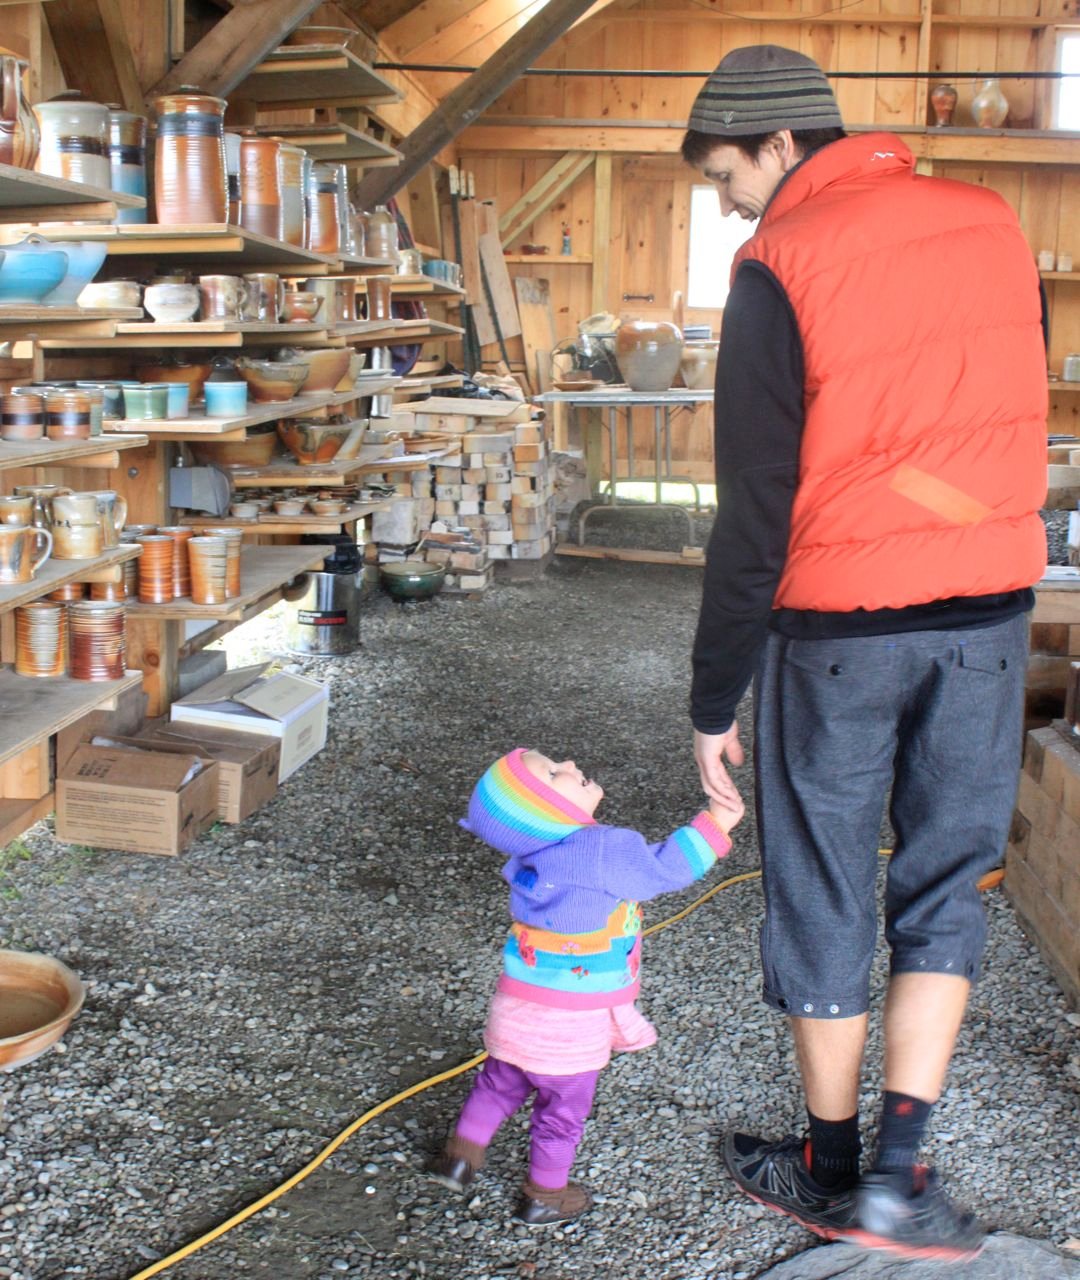
This was by far the smallest window of time we'd given ourselves to fill all 350+ cubic feet of our large kiln. We plugged away through the month of September, and Nathan threw lots of big bowls and crocks, which helped a lot. We were also super lucky to have the contributions - in pottery as well as time!! - of several other local potters, who agree to trade labor for kiln space, an arrangement everyone seems to enjoy. The wood had been prepped well in advance, and was sheltered under our very large kiln shed, a thing of beauty for which we will no doubt be eternally grateful.

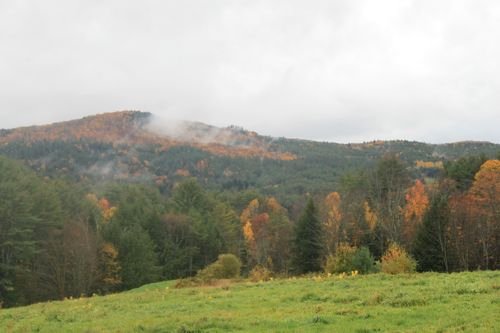

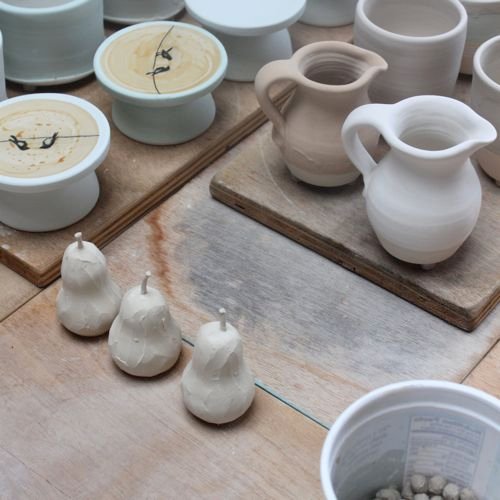
We gave ourselves a much bigger window to load the kiln - nearly two weeks - which was a nice change of pace from what has historically been a last-minute all-hours push. As they say, kids change everything, and we decided it would be a lot more sane to work the loading into our normal daily routine. And yet somehow (why, why, why???) we were still bricking up the doors late into the night before we were scheduled to begin . . . sigh.
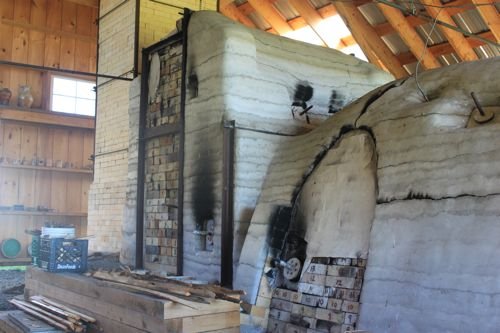
This firing was characterized by a nearly constant rain, but thankfully, we stayed warm and dry throughout. The fourth and final day of the firing was smooth, and we pulled many very lovely clay rings from the kiln, promising the hope of many beautiful pots within.

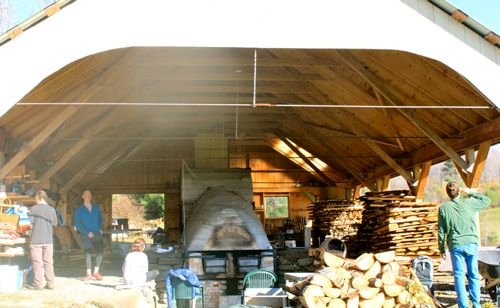
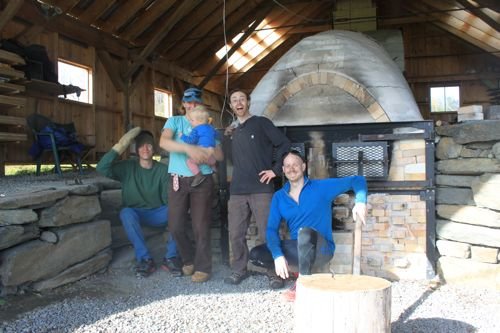
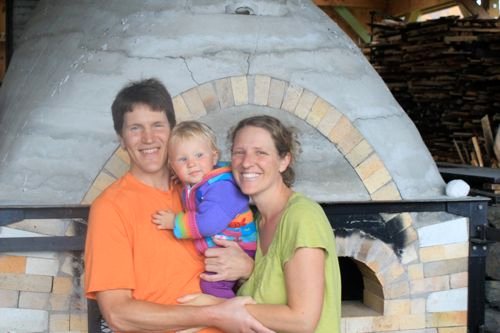
We were not disappointed. I'm sure at some point, we'll have to stop saying "this was our best firing yet," but IT WAS. It's tough to let the kiln cool for a full week for a peek at what lies within, but it was- and always is- worth the wait.


join us

third firing : the results
Just a quick note here to say that our third firing was a success! Of course, there are always hard lessons learned in wood-firing (more on that later) but overall, we were very pleased with the pottery. Here are a few snapshots from the unloading.
{when you're ninety years young, you deserve the first peek at the kiln. :) Becca's grandmother approves . . .}
Find us + our new pots in Yarmouth, Maine this weekend for Clam Festival Craft Show!
And we'll have new work on our website a little later in the summer . . . stay tuned.

coming up for air : third firing done!
The last few weeks here have been very full indeed. While the kiln is slowly cooling, we finally have some time to tell you about it! Since moving in to our new studio in early May, we've had about eight weeks to fill the two large chambers (about 350 cubic feet) that make up our wood-fired kiln. Thankfully, the work in our new space flowed beautifully, and the storage racks we built there and in the kiln shed enabled us to throw as fast as we could keep up with the drying pots.

Scenes from Becca's studio . . . peony-scented pottery making. :) Lots of mugs and cups were in the works here . . .

mugs in process


Becca's baskets
And bowl/baskets and plates galore!

Over on Nathan's side of the studio . . .

There is sometimes (okay, rarely, but it's fun) an audience above to watch things get made from above. (Eventually, the showroom of finished work will be upstairs, so if you're shopping for pots, you might see them being made below!)

The glazes get stirred and the raw pottery lined or dipped into glaze.


Almost all of our pottery gets glazed without being fired first - we skip the bisque firing - so it's raw or 'green.' Although this took some getting used to, this simplifies the process for us in many ways, and the piece is completed in one breath, so to speak. We do, however, have to fire the kiln much more slowly as a result, ensuring that we don't 'shock' and crack the pots.

Once glazed, the pieces dry on the racks . . . and then get carried out to the kiln shed, board by board. (When it's not raining - which has been rare these days!)


We closed in the west wall of the kiln shed last fall to accommodate nearly 100 boards of pottery and keep it dry and easily accessible for loading the kiln. This was our first time using this system, and it worked out really well. In fact, as it turns out, a full kiln load is MORE than a full wall's worth - 100 ware boards of pottery were set and ready to go.

After about two months of studio work, we had around 900 pieces. Included in this firing were also pieces from potter friends and neighbors - put some pots in, take a stoking shift!
From the kiln shed, we can see the new studio. We still can't quite believe that we built this between firings . . . it sure is nice to look out at our accomplishment.


The view in the other direction is also great . . . pottery headed into the first chamber! We begin by stacking the front, closest to the firebox where the wood burns. This area will get the most natural fly ash and bear the brunt of the heat. It's almost seven feet tall here, so a lot of pottery goes into this area.

A little farther back, in the middle of the big chamber, we loaded a lot of glazed pieces (there's not as much natural ash to do the glazing here), including Nathan's bowls which are designed to be stacked rim to rim to maximize height. The little wads of clay between them - and on the bottom of every piece in the kiln, are to prevent the pieces from fusing together or to the shelf they sit on.


Lego knew the best place to stay cool was inside the "cave" of the kiln on the cool bricks (cool for now, anyway!) . . . but pretty soon, there wasn't a whole lot of room left for him. And it does get a little dicey when he throws his 90 pounds around the fragile pots. :)

The loading took us about four days of very long hours. We often worked well into the evening with lights to keep us going . . .


Nathan got the very last pieces in with some crazy yoga moves . . . it's a really full load!

As for how things were looking elsewhere in the shed, we had prepped a lot of wood. We hoped it would be more than we needed, and it was. We had a good mix of hard and soft woods - the hardwood being small log lengths we hauled out of our woods, left over from a recent logging project. The softwoods, mostly in the form of slab offcuts, come to us from a neighbor and a local mill in the next valley over. We cut them into four foot lengths, and stack them under the shed. (This was our first firing with wood under the shed - boy were we glad! It's been SO rainy here . . .)


Once we had finished loading all the pottery in, we bricked up the doors- with their handy numbers as place markers - and made fire!


Minutes after starting the firing, we were treated to this in the field near the kiln, which we took as a good omen . . .

The firing proceeded smoothly, and we stoked wood into the front of the kiln 'round the clock for the next four days. We were grateful to have lots of friends take shifts this time - Nathan still did about twelve hours a day, while Becca did six on the kiln plus a 'second shift' in the kitchen feeding hungry stokers!


By the fourth day, we were ready to begin side stoking - where the wood goes in between the pots in the back of the first chamber and the soda/second chamber. This brings up the temperature more evenly overall and provides a little more ash on the pottery farther from the main firebox.


As we near the end (gauged for us by the melt of cones and the pyrometer reading), we begin to pull small rings of clay from the view ports. Once cooled in water, they give us an idea of whether the surface of the clay is smooth and glassy. If the rings are rough, we need to keep raising the temperature. Fortunately, they were lovely and we finished stoking just before the 96 hour mark.

Matt and Nathan 'mudded' the air ports in the front. This prevents cold air from leaking into the kiln while it cools slowly over a week's time. Yes, we wait a whole week - it's hard, but we don't want to crack the pieces by opening it when it's too hot! When you're waiting on about 1000 pieces, it's worth the wait. :)

We hadn't been finished for long - maybe an hour or so - when we were treated to another rainbow, this time with an end in each of our fields. A magical way to culminate months of work . . .

We'll be back next week with photos of the new pottery! You can see our pieces at one of our upcoming shows. We'll also have new things in our shop a little later in the summer.
~Becca

join us for Vermont Open Studio this Memorial Day Weekend
We hope you can visit us this Memorial Day Weekend for the 21st Annual Vermont Studio Tour. Artisans' studios around the state will be open Saturday May 25th and Sunday May 26th, from 10am to 5pm. There are many in our local area - you can use the interactive Google map below to find things to see and do in our area, and how to get there. We are the bright green marker!
View Vermont Open Studio Tour 2013- White River Valley Area in a larger map
You can also request a brochure map of your own, or download maps here.
Once you arrive in VT, look for the bright yellow signs dotting the landscape. We are #175 on the Tour this year!
We'll have tours of our large wood-fired kiln that we completed last summer . . .
. . . and pottery (firsts and seconds) in our milkhouse showroom.
But perhaps most exciting of all is that our brand-new studio, completed in the seven months since the fall studio tour, will be open to the public for the first time!
We are actually all moved in, getting settled in the new space, and beginning to make pottery - AND TOTALLY LOVING IT. :)
Hope you can join us to celebrate, tour, shop, and enjoy our little corner of Vermont!
~Becca and Nathan
a new year, a new chapter
I remember hearing of a friend's resolution on the first day of 2012 to "stop talking about doing things, and actually do things." That struck a chord with me. Not that I'm one to sit around for extended periods, but there were some major things I really wanted to do this year. I really didn't want to just talk about doing them. Very high up on that list was finishing our kiln. It had been two solid years of building - much longer than anticipated, on my part anyway - and we were scraping by, using friends' kilns (some of them in other states, yeesh) to fill orders and get ready for shows and commitments to galleries. Not to mention we'd be telling people we'd be done with the kiln for what seemed like waaayy too long. It was time. to. be. done.
Well, long story short, we did it. We finished the kiln in May, and fired in June. And again in July. We even got beautiful pottery! We took our new wood-fired pottery to our biggest Maine show, and our nine-day show in New Hampshire over the summer. The response was very very positive.
These successes alone were almost momentous enough to make for a complete year. But we kept doing. We added ten more feet to the kiln shed, keeping the weather off the kiln and us a little more cozy. We closed it in, and added a wall for storing pottery (yeah, we haven't mentioned that yet here- but we did it!). We moved wood in, keeping it dry and ready for our next firing.
I built a chicken coop! We'd wanted to have our own laying hens for some time, and the urge to build a home for them was so strong it kept me awake at night. (True story, albeit weird.) Design ideas and calculations filled my head until I pulled out some old barn boards and my hammer. And we got those chickens, as chicks, actually - and we're so happy to finally be getting fresh eggs from our happy flock.
While building said coop, I decided to put the siding on a diagonal, so it would be stronger when we skidded it around the field with our tractor. That led to a Google search for tips and tricks on how to do this. That very search pulled up something much more consequential than chicken coop photos, as it turned out: in one fell swoop, I found the blog that found us a studio builder.
In a single, gutsy moment of intense craving for a studio-of-our-own, I emailed Mr. Abetti to see if we could even consider one of his beautiful barns. (Maybe we could be his crew for the project?!) This was in June. He wrote back almost immediately and we began a correspondence, including meetings on each of our summer birthdays, that resulted in an incredible building marathon that ended in a shell of studio, roofed and closed in (mostly) before this end-of-the-year snowfall.
We broke ground in September, did complicated footing layout in October, and our very own insulated concrete foundation in November. (Yeah, I still kind of can't believe this part.)
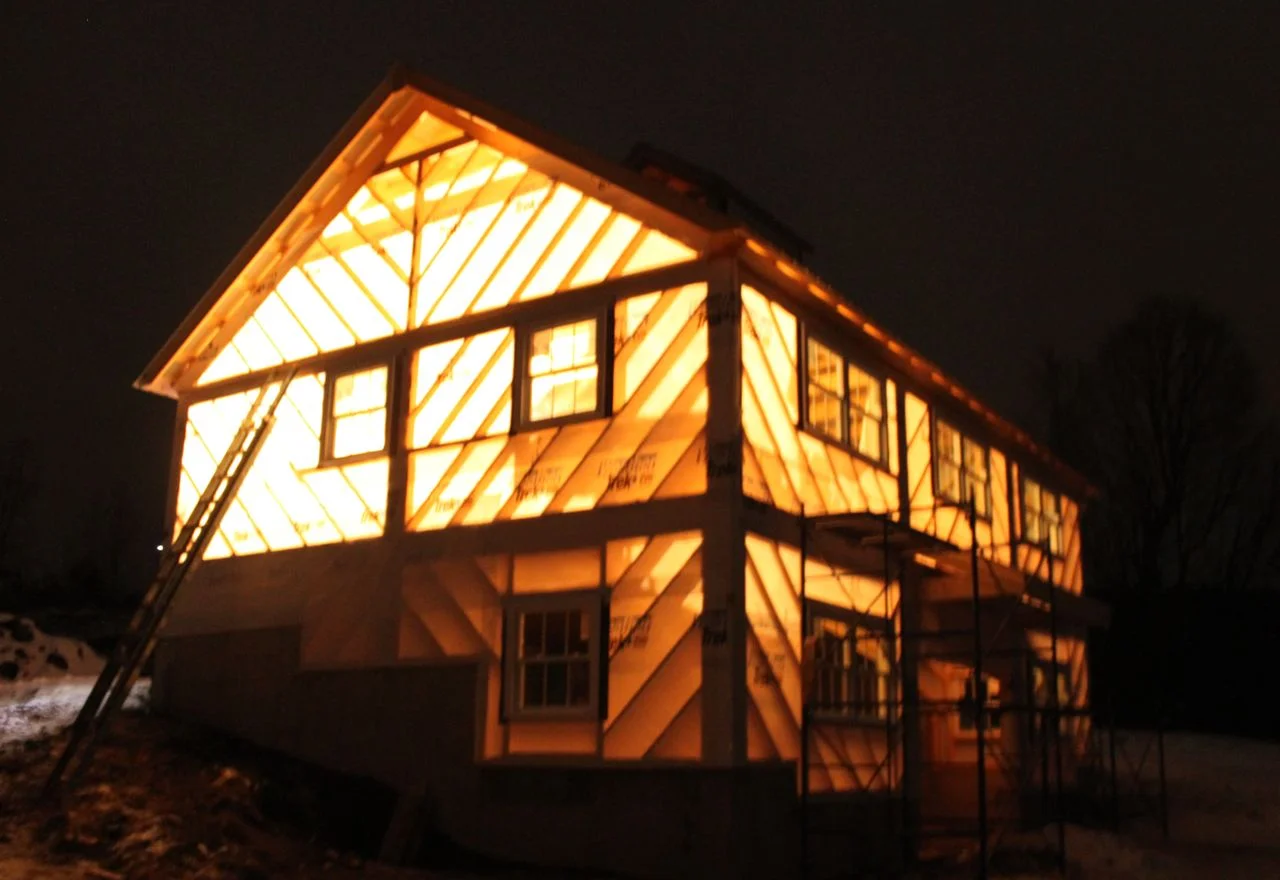
Two days before Thanksgiving, we began working on the studio structure. On the winter solstice, we had the roof on, the windows in, and the wrap on.
We're amazed, giddy, delighted, and gearing up for what looks like a lot more doing in 2013. We just moved out of our rented studio in a nearby town, and put our pottery making tools and supplies into storage. Woah. Yup, we're making a big leap : we're very hopeful banking on the fact that the next pottery we make will be in our new studio. (Say hello to buckets of water, unfinished walls, and extension cords!)
On this New Year's Day, however, we are enjoying reflecting and giving thanks for all of YOU who helped us get to this point. (OK, let's be honest, we are also working . . . by starting to put siding on our studio building! We might not be able to match 2012 in productivity and excitement, but we'll sure try. ;)
Here's to a wonderful 2013.
Cheers,
~Becca
second firing
We have begun to unload our second firing . . . . and although we haven't even seen the firing in its entirety (oh, how we've had to learn patience!), it could be said that the 'kiln gods' have smiled on us. With just days to go before our biggest and best show of the year, we are overjoyed to find beauty after beauty emerging from within the still-warm brick walls. We are feeling oh so very grateful!
lately
Lately we have been . . .
~enjoying the 'wilds' of summer in full swing . . . thick air, bright sun, and fresh veggies from our desperately weedy jungle of a garden and most especially our farm share (tomatoes were green- and fried!- last week, this week deep red, orange, yellow, pink and splitting with vine-ripeness . . . mmm)
~caught up in the intense and wonderful whirlwind of a four-day craft show in Maine, a 70-hour wood kiln firing, and an impromptu multi-generation + multi-family reunion on the farm
~getting our feet back on the ground after said whirlwind . . . taking a brief pause to catch our breath before the next big push
~feeling grateful for all of the positivity and encouragement coming our way, and so very thankful for the incredible support of our families and friends and random emails of kindness (we couldn't do this without you!)
We have also been . . .
~putting the finishing touches on as many pots as we could make in what amounted to a three-week period after unloading our first firing
~appreciating each others' craftsmanship (constantly surprised and amazed by what the other comes up with) and thinking we are just beginning to scratch the surface of all the things we hope to make!
~feeling the ups and downs of the summer studio we set up under the kiln shed (pro: great view, short and scenic commute, con: blowing wind and cracking fast-drying large pottery)
~honored by the presence of Becca's west-coast-dwelling brother Jeremy and his lovely lady Kate for help with our second firing (and hoping they love this kiln-glasses fashion shot as much as we do)
We are . . .
~thinking and hoping very much that the cooling kiln that awaits us just *might* be a good firing (all signs so far point to good changes since the first try . . . we flattened a lot more cones this time! translation: it got hotter in there!)
~knowing there will undoubtedly be many surprises, good and bad, when we finally get to peek at this second go-round next week
~glad to have tried a shorter and less consumptive (wood) firing
~readying for our biggest show of the year, a truly wonderful event, spanning nine days in August
~remembering how different the pace of life is in January ( . . . and maybe looking forward to it- just a little bit!)
We hope you are all enjoying a wonderful summer . . .
~Becca + Nathan
unloading
The day of the unloading began with a few preparatory tasks, namely cleaning up and numbering the door bricks for an easy stack-up next time. Not so long ago, I might have rushed to take down the doors, pulled out everything, and then been faced with a giant mess to clean up . . . but three years of kiln building and a very methodical partner have had a good influence . . . namely in the form of patience! We even vowed to clean and grind kiln shelves and posts as we went; four shelves of pots to unload, four to grind. Nonetheless, there was a definite sense of excitement as we took out the bricks and got our first good glances.
Holding our breath . . . our first reactions were mixed . . . initially the pottery looked OK, if a bit on the pale side. (We do tend to prefer lighter tones from the wood kiln as opposed to dark browns, so this was at least visually unobjectionable.) What we quickly realized, though, was that most of what we found in the middle of the kiln was dry. Under-fired. Too crusty, and perhaps not even water-tight. Ugh.
The good side of all this was that not too much was ruined! In fact, in the first couple hundred pots that we pulled out, only three ended up in the wheelbarrow. The bad news was that only three ended up on the table of work to actually sell. The vast majority of the work we found in the first chamber was destined to be re-fired. (All you potters out there, we think 'too cool' in this case was about cone 8 or so.)
At least we're a few hundred pieces closer to our next firing!
We continued on like this for almost an entire day, filling up the tables with pieces to be re-fired. We took a quick trip to the river for a bit of helpful perspective, no doubt feeling a little down, but heartened somewhat by the fact that we didn't find any major disasters, and that the flashing and ash colors looked pretty nice, for the most part, knowing it just needs more heat!
Why didn't we keep firing if it was so cool? The cones in front of the kiln showed cone 12, and the stack just behind was not far behind. We didn't want to risk over-firing the front, but in retrospect, we should have kept firing and sacrificed a few pieces in front for the good of the rest of the kiln. We also hoped our side-stoking efforts would even things out, but we just didn't stay hot-enough for long enough. The biggest thing we struggled with during the firing was the un-eveness of temperatures from front to back, top to bottom. Our chimney is HUGE, which means it pulled much of the heat across the floor and out the stack, even with the dampers at 10%! Also, our burn was very, very efficient with all the built-in air channels, so much of the chamber was oxidized as we missed out on a lot of the reduction cycles that contribute to richer colors.
At nearly 6pm on the first day, Nathan decided it was time to take down the door to the soda chamber. We were hoping we would see something to lift our spirits. (I can't believe we hadn't opened it yet!) And we found beauty . . . ahhh. We each took a deep breath of relief to find gorgeous flashing slips, melted glaze, and lovely effects from the soda. Most of what we could see looked really nice- we felt saved by the soda chamber!
With that good news, we called it a night. Back at work the next morning- already 92 degrees at 8am- we finished unloading the rest of the first chamber, and found a few gems in the rough. Some places were hot enough to melt the ash on the surfaces (that is, if the pieces hadn't cracked)- the very front stack had some nice ones, and the areas around the flues at the back of the chamber were lovely, too.
We started in earnest unloading the soda chamber in the extreme heat. We found lots of beauties- finally some ware boards of pottery ended up on the 'to sell and photograph' table! The melt was good, and while the chamber wasn't without issues of its own, we had a much better success rate overall.
The nice pottery we found made clean-up a little easier. The kiln itself fared pretty well, just a few bricks out of place in the main firebox. The castable fired to a very pretty pure white and held up beautifully while the bricks took on a toasty glow. Overall, the shelves cleaned up fairly easily, thanks to some grinding bricks and a diamond cup attachment for the angle grinder. There were some big nasties in the soda chamber, especially the soda that accumulated on the false floor (i.e. removable!!) that Nathan put in pre-firing. (Can you believe that gnarly situation?!? And no, he did not intend to match the color with his shirt.)
We are hoping and scrambling planning to fire again in a month, before our biggest show of the year. We have a new road map, changes planned, and a lot to do . . . and are already excited to try this again!
~Becca
Next up: A proper photo shoot of the newest work, and hopefully a select few posted to our online shop soon.
first firing
Two years, eleven months, and sixteen days after breaking ground on our two-chamber climbing kiln, we lit the first fire. Stacked with over 700 pieces of mostly raw and unfired pottery on 121 kiln shelves, we were ready to see how our creation actually worked!
The first couple of days of the firing were fairly quiet. We burned hemlock and a hard wood mix fairly slowly, starting in the four-foot long opening at the bottom of the kiln, and gaining just 25 degrees per hour, or 150 degrees per shift. Nathan and I split up the days by taking six hours on and six hours off, so one of us was always at the kiln, taking good notes and taking it all in. (The other was trying to get a bit of sleep! 12-6, 6-12, 12-6, 6-12, you get the idea.)
The kiln was really responsive and fairly easy to control at this stage . . . we were learning each other, and enjoying ourselves. Friends brought dinner, and good company, even homegrown strawberries and fresh milk for coffee. (Thank you Becky, Chelsea, Dave, Sarah, Bob, and Sarah!)
We were really pleased with our firebox design, which is a sort of stepped down staircase filled with air channels for efficient burn. The four-foot lengths are stoked first through the opening in the bottom of the kiln, and eventually through the doors on top, alternating, and stoking wood every 5-10 minutes. The slab of wood sits on the 'stairs' and burns all along its length. Below is a photo of the inside of the firebox taken before we loaded the kiln.
We burned a lot of wood. One of the biggest learning experiences during the firing was that our chimney is SUPER powered. (As in, a very big opening.) It drew a lot of the heat across the bottom of the kiln and out the stack, causing us to consume more wood than we hope to in the future. (We'll close up the flues a bit more with bricks, so it doesn't pull quite as hard!) We estimate that we burned about 5 cord of scrap hemlock and pine slabs, and 1 cord of hardwoods. Thank goodness for our wonderful friends who stopped by nearly every day to help us move wood up to the kiln front for us; we were so glad we had TONS of wood on hand and at the ready. (Thank you Grace, Matt, Chelsea, Dave, and Charlotte!)
Side stoking (putting wood into the sides of the chambers in addition to, and then instead of the front) began in earnest in the wee hours of the fourth day. At that point, the pyrometer (basically a high-temp thermometer) we had salvaged had ceased to give us a reading (it only went to 1,999!) so we were firing solely using cones and blowholes (pictured above) as indicators of heat and internal atmosphere.
By hour 90 or so (the morning of the fourth day), we had reached cone 12 in the front of the kiln, and needed to stop stoking there, and move onto solely the side stoking ports in the back of the first chamber, and in the soda chamber. The narrow gauge dry wood ignited on contact.
Thankfully, we had great help at this point. Our friends Kaitlyn, Sarah, and Matt (all potters!) showed up with food and most importantly, fresh energy. At this stage, we were both running on very little sleep, but nonetheless feeling energized and excited by all that was going on. (Thank you, adrenaline.) If the rest of the firing were a slow jog, these last few hours were a flat-out sprint. We moved quickly to get the soda chamber infused with soda (soda ash mixed with some whiting and borax, made into a paste, and stoked into the kiln on boards), and to raise the temperature evenly throughout.
We checked cones and pulled draw rings, and were pretty happy with what we saw. We would have liked it hotter in some places, and cooler in others, but that's wood-firing! (Especially the FIRST wood-firing.) By eleven-fifteen that morning, after 94 hours of firing, we were ready to shut it down. All the plugs went back in, the damper was closed, and we did a wee bit of collapsing celebrating. It's safe to say that regardless of the results, this first firing was a huge success in many ways. We are grateful for the experience . . . and hoping and waiting for at least a few (?!?) nice pots.
We did it!
P.S. Cooling takes an entire week. Stay tuned. We can hardly wait.
first loading
The week+ it took us to load our new kiln for the first time put our kiln shed to the test: rain, rain, rain. Thankfully, we had 1500 square feet (!) of covered space to keep our greenware (unfired pots) dry. Between the raindrops and thunderstorms, we ferried ware boards of pottery to the kiln, on foot and eventually by very-slow-moving subaru. (Turns out, 300 feet is a looong walk when there are 700 pots!)
What a joy to be inside the kiln for the first time, getting a feel for the space, assessing the layout of our new shelves. This first kiln loading was a long one for a number of reasons, not the least of which was determining the best use and layout of the kiln shelves we had, and painting every one with kiln wash (alumina + kaolin mixture) to protect them from dripping, melting ash. (A huge thank-you here to our kiln shelf shareholders for helping us purchase all these beautiful new and new-to-us shelves!) We were also cutting posts (pieces of brick) on the wet saw as we went, and pausing here and there to take it all in . . . I had forgotten how much excitement and promise and well, let's face it, tediousness towards the end, comes with loading a kiln. It had been over four years since either of us had last loaded a wood-kiln, and it felt beyond great to be back in the swing.
All said and done, 720 pieces of pottery, large and small, fit onto 121 kiln shelves. And then we bricked up the door . . .
first glances on the INside
filling up and burning out
What a week it has been! We began working last Tuesday with our friend Dave, another friend Dan, his skid steer, and a very large pile of granite rip-rap from the quarry up the road. Our goal was to fill up the hemlock retaining walls we'd built around the kiln to hold the arch in place while our kiln expands and moves during firings and over time. The work was heavy (isn't it always?!), but with three granite-chunk-placers and one very adept machine operator, the job went quickly. By lunch time, we'd moved what felt like a small mountain in and around the kiln, and brought grade up on the surrounding ground as well. (A huge shout-out to Dave, by the way, who when told we were going to be moving large rocks for several hours, said "Sounds like fun. What time?" Dave, you are truly awesome.)
The most exciting part of all this was that we were ready to burn out the wooden form on the kiln's interior! OK, almost . . . we did build little brick culverts around the passive dampers in the flue, raised the retaining walls between the soda chamber and the chimney, and they filled them by hand. By Friday, we were ready for burn-out.
Before we lit the first match, there was still a bit to do . . . stuff the kiln with newspaper, and brick up the doors. We crawled in and around the plywood forms, stapling large clusters of crumpled paper to the arches and the lathe, and leaving little pieces of kindling every which way to wick up the flame for a complete burn. We weren't entirely sure how the burning would go, and wondered if we'd be pulling charred chunks of wood out later. Um, yeah, let's just say it didn't quite happen like that.
After bricking up the doors- hoorah for 3" thick reclaimed-from-our-NH-kiln bricks!- we were ready to light it up. Or, as the case may be, I was ready to shed a few tears. Tears of joy, apprehension, excitement, exhaustion, and so many other feelings swelled up and poured out after nearly three years of working towards this one goal. We were about to have a finished wood kiln of our very own, built nearly entirely by our own two hands, all because we fell in love and had a dream. (Cue the violin music . . . )
The fire started easily enough, dry newspaper catching quickly, and before long, light gray smoke was seeping out of every crack, but most especially out of the chimney, indicating good draw. Yippee! Soon, however, that light smoke turned to thick, black smoke chugging away with great force . . . and I was on the phone to the fire chief, the neighbors, anyone I could think of who would no-doubt be thinking that our house- or something very, very large- was burning down. We even had some random passers-by pull down the lane to ensure everything was OK. While Nathan tended to the kiln, I assured everyone that it was contained and safe, apologized for the smoke, and reassured folks it would never be quite this smokey again. Which is true- as compared with our future firings, this was a far colder - only 500 degrees- and therefore dirtier fire with more combustible material smoldering burning than we will ever stoke into our kiln at one time.
When I returned to the kiln site, the form in the first chamber was GONE. (Apparently, there would be no charred remains to be taking out with the saws-all!) The second chamber collapsed soon after and disappeared quickly. We sat in the front by the stoking doors, mesmerized by the flame as we watched it bring light to the shape of our new kiln.
During a typical firing, we will see mostly the front stack of shelves, posts, and pottery, so to be able to see the entire kiln filled with fire- straight back to the flues- was an unexpectedly delightful experience.
The next fire we build will start more slowly, but burn oh-so-much hotter . . . we hope to be reaching 2400 degrees two weeks from now, if all goes well! Stay tuned.
~Becca
thank you kiln shelf share holders!
Last spring, we launched a little program we liked calling our "CSA." And we were overwhelmed and delighted by the support it got! We sold 85 kiln shelf shares to over 60 different people from all over the country, including people who knew us and people who didn't! This winter, thanks to the generosity of the 'shareholders', we were able to purchase beautiful new and new-to-us silicon carbide kiln shelves for our new wood kiln! We love that we were able to get the bulk of the shelves from a small, independent business in the rural midwest. (Thanks, Billy!) The shelves arrived over a period of a couple of weeks, packed snugly in very heavy crates, and are now waiting patiently at the kiln site for us to be ready to use them. (Soon, very soon.)
A HUGE thank- you to those of you who helped us get to this point. We are so grateful for your support and encouragement, and will be thanking you in the form of new pottery very soon . . .
If you have questions about your share, or our kiln shelf shares program, please feel free to contact us at nathanandbecca@gmail.com.
the season for muddin'
It's the season for mudding around here . . . on the kiln, anyway! (OK, on our dirt road, too, but that car-bottom-scraping story is for another time and place.)
By some wonderful coincidence, an record-breaking stretch of warm (hot) weather has descended upon us in conjunction with Nathan's spring break from teaching pottery at Dartmouth. For us, this means two solid weeks of 10-hour days putting some of the 'finishing touches' on our kiln. We couldn't be happier!
Here's how this works: the dry materials- mainly sand, sawdust, cement, and a bit of other fireclays and grogs we had lying around- get measured by volume, and dumped into the cement mixer we borrowed from a friend. Water is slowly added until the mix is smooth-able but not too slump-prone (those are technical terms, by the way). Layer by layer we work our way around the kiln, troweling the adobe-like mix smooth. In and around ports, up the walls of both chambers we go . . . the purpose of this 'structural frosting' as I have come to call it, is multi-fold, but essentially it's designed to insulate the kiln a bit more (the sawdust eventually burns out creating air pockets) and hold the whole thing together (that is until it cracks from expansion, but that's another issue). It also unifies the kiln's chambers, and hopefully gives it an attractive final appearance! (We haven't decided on a final color, but will likely paint some sort of oxide on the adobe- pale yellow? white? earthy red? We'll have to see.)
I leave you with this shot of the completed-with-newly-refurbished-transom-window back wall of the kiln shed. Stay tuned for some photos of the finished surface in the coming weeks.
Enjoy the beautiful weather!
kiln shed love
A quick photo comparison of the past couple of months (January 2012 to March 2012) . . . we spent a good portion of January outside in the odd non-winter weather working on the kiln shed, and we LOVE how things have changed out there. Aside from now being 10 feet longer, the shed lost its unsightly, windblown tarp of a back wall (that was up for well over a year), and has graduated to an actual back wall of lovely local ship-lap siding. (This works oh-so-much better at keeping out the snow, now that winter has finally decided to arrive!) But the best part of all is the 'sky-lights' we installed between our roofing panels. It's amazing how much light that brings into the back of the building . . . and we're looking forward to even more light in the form of windows along the west wall, and the eventual disappearance of rusty-metal tin roofing-turned-siding that is keeping the snow out!
It sometimes it seems these little improvements are even sweeter because they didn't happen right away . . . good things made even better by the simple fact of waiting and dreaming . . .
(A few more photos of the back wall here. And I'm sure there will be more soon, as spring arrives and we begin staining the outside of those lovely boards, adding more windows . . . so much to look forward to!)
the chimney
Over the past few weeks, when asked what stage we were at with the kiln project, the answer was consistently "the chimney." We knew it would be sizable, but it turned out we used over 2000 bricks! In fact, nearly every last hard brick to our name went to the cause. (We did manage to save a bunch of nice bricks to cut into posts for stacking up our shelves.)
What we did know was that the chimney had to clear the building for good draw and for safety's sake (at peak temperature, the chimney will spew an amazing flame several feet in the air, and our shed is built of, you guessed it, wood) so we positioned the scaffolding around the base, and rigged up a pulley + milk crate system to get the bricks from Becca on the ground to Nathan on the chimney. And then we hauled and hauled and hauled, and leveled and laid, and leveled and laid . . . here are few photos of our autumn chimney building!
We got a little help from Becca's family early on. (Dad was a very eager hauler!) Lego, not so much helpful per se, unless you consider cute-ness to be a morale booster.
Bricks waiting for their trip up. Becca did most of the hauling, while Nathan did most of the brick laying. These bricks weigh about 8 pounds apiece! I guess we're feeling pretty strong after this part of the project . . . phew. For a good portion of the chimney, we used a double-thick stack, with each of those courses using 32 bricks. And with each course we gained 2.5 inches of height. Yup. Once we switched to a single course, things went much faster, only 14 bricks/course.
The chimney building tools atop the staging. The bricks of the kiln are mostly dry-stacked (i.e. no mortar) because of the incredible expansion the kiln will undergo during the firing. The one exception is the chimney bricks, where a thin coating of fire clay and fine grog was 'painted' on to help them set. We also built this little jig (below) to help ensure the correct placement of bricks from course to course. A lot of leveling needed to be done in every direction, but this jig helped Nathan ensure the inner dimensions stayed the same. (By the way, the inner dimension is nearly 27" square!)
The last pallet lays empty . . . celebrate! Oh, and some of you are probably wondering why there is an arched area in the back of the chimney. (below) When we configured the active dampers, we decided to span the area with a piece of steel and refractory castable. (We believe this area, with it's distance from the firebox and the cool air intake, will be cool enough for the steel to survive.) But just in case something goes wrong with this span over time, we wanted to be able to rebuild this area without taking down the entire chimney. So essentially, we hope to never have to use it, but just in case we do, the idea is that the arch supports the weight of the chimney while we scamper about with repairs. (It's not much fun to think about our kiln aging, moving, cracking, what have you, but it's good to try to plan ahead!)
Ta-da! (OK, there's still a bit of work to do in the little arch, but hey, we think it's looking pretty good!) Now, on to insulation . . .
Happy Thanksgiving to you all!